How to Easily Import Data from Snowflake to Dundas BI with Datameer
- Ndz Anthony
- July 14, 2023

Just as a great chef knows that the key to a delicious meal lies in the perfect blend of ingredients, any data scientist knows that the secret to insightful analysis is getting your data right where you need it. And today, we’re going to serve up a delightful recipe for importing your data from Snowflake to Dundas BI. It’s simpler than you think, and we’ll guide you through it step by step.
Snowflake and Dundas BI — two heavyweights in the data world — need no introduction. But how do you transfer data between the two seamlessly? That’s where our trusty sidekick Datameer comes into the picture! Ready to dive in? Let’s go on this data transfer journey together.
Stay with me and by the end of this blog, you’ll be moving data between Snowflake and Dundas BI like a pro, all while sipping your favorite coffee (or tea, if that’s your jam!).
What is Datameer, Snowflake and Dundas BI?
If you’re here, you likely have a good grasp on what Snowflake and Dundas BI are. But just for the sake of being thorough (and because we’re all about being thorough in the data world), let’s do a quick recap.
Snowflake, not to be confused with those unique ice crystals falling from the sky, is a cloud-based data warehousing platform loved by data engineers and analysts for its scalability, performance, and zero maintenance needs. Imagine an infinitely large room where you can store all your data goodies — yeah, that’s Snowflake for you!
On the other hand, we have Dundas BI. Picture a master artist at work, turning raw, formless blobs of paint (read: data) into a masterpiece of insights. That’s Dundas BI in a nutshell. It’s a flexible and interactive BI tool that lets you visualize, analyze, and understand your data better.
“But what about getting my data from Snowflake to Dundas BI?” this is the question that is probably in your mind right now. Well, now here comes Datameer, the heroic figure of our story. Think of it as a friendly concierge who takes your data from Snowflake, checks it for quality, and safely delivers it to Dundas BI.
Now that we’re all on the same page about our tools, let’s move onto the fun part — why you’d want to import data from Snowflake to Dundas BI and how to do it!
Why Import Data from Snowflake to Dundas BI?
Before we venture into the ‘how’, let’s take a moment to understand the ‘why’. Why should you bother moving your data from Snowflake to Dundas BI, anyway?
Well, imagine having a golden goose (your data) but not understanding its language. Not very useful, right? That’s where Dundas BI comes in. It translates your data’s language into something you can easily understand: insightful, easy-to-digest visualizations.
But why not just visualize the data in Snowflake? Here’s the deal: Snowflake is like a multilingual librarian who stores and organizes a world of information. But when it comes to creating beautiful, interactive data stories, Dundas BI takes the cake.
When you pair Dundas BI’s dynamic visuals with Snowflake’s efficient data storage, you’re set to discover insights faster than ever before.
According to a report from Nucleus Research, companies that leverage analytics like Dundas BI can see a return on investment (ROI) of 1201% — yes, you read that number right. That’s like turning one dollar into thirteen, just by making your data more understandable and actionable!
So now that we’ve covered the why, it’s time to roll up our sleeves and get into the how. Ready to turn your data into gold? Let’s get going!
How to Import Data from Snowflake to Dundas BI
You’ve made it to the main event! Now, let’s transform you into a data-importing wizard. We’ll break down the process into simple, easy-to-follow steps. By the end of this, you’ll be zipping data from Snowflake to Dundas BI faster than you can say “data transfer”!. But first, one important thing! I assume that you already have created accounts for Datameer, Snowflake and Dundas BI.
Step 1: Launch Datameer Start by launching Datameer on your device. Make sure you’re running the latest version for the smoothest experience.
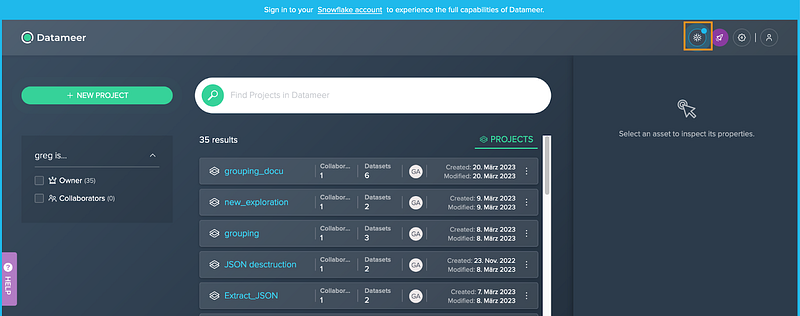
Step 2: Connect to Snowflake. Once you’re in Datameer, To access the login dialog, simply click on the “Snowflake” icon located within any space in Datameer. You’ll need your Snowflake account details handy for this step, so make sure to have them ready.
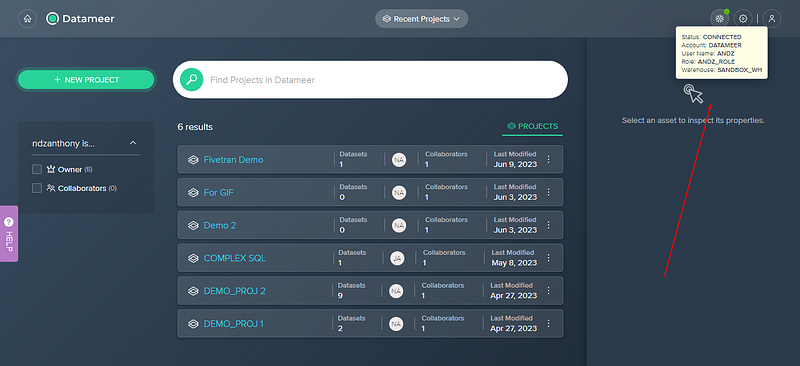
Step 3: Configure Your Snowflake Connection In the configuration window, input your Snowflake account details, including your account URL, username, password, and warehouse. Triple check your details — it’s like dialing a phone number; one wrong digit and you’ll reach someone else’s data! Once you’re logged into your Snowflake account, just hover over the Snowflake icon to check out the current login data.
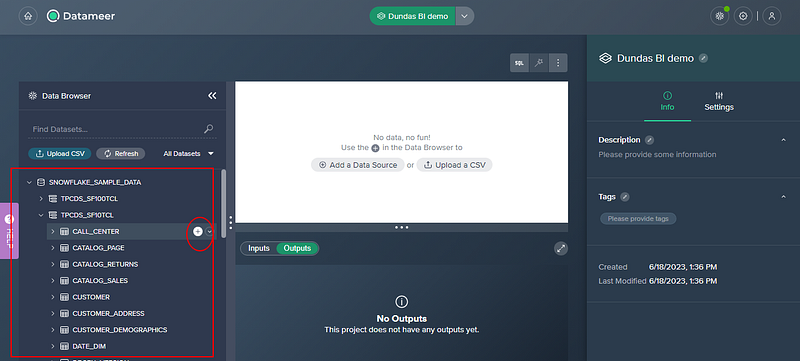
Step 4: Import Your Desired Data. Now that you’re connected to your Snowflake warehouse, you’ll see a list of your available databases. Select the database and the specific data you want to import into Dundas BI. It’s like going shopping, but instead of clothes or groceries, you’re picking out the data you need!
Step 5: Exporting Your transformed data to google sheet.
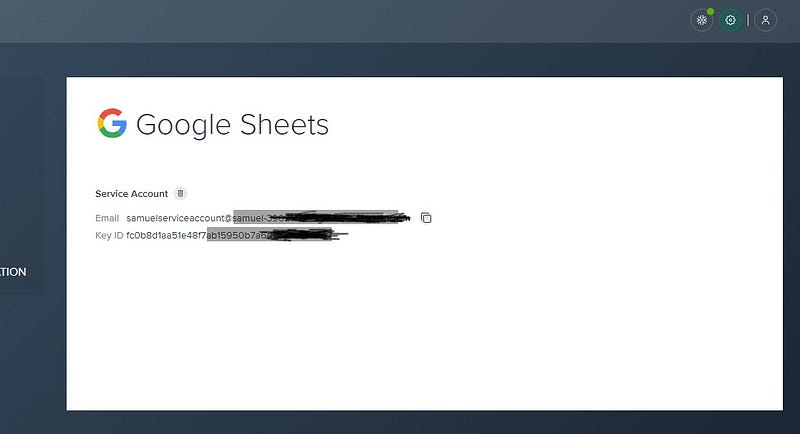
-For this step, make sure your google sheet settings are configured:
-You also need to have the Google Sheet document open in your browser. You can then copy the URL from the address bar of your browser and paste it in Datameer. Here are the steps you can follow:
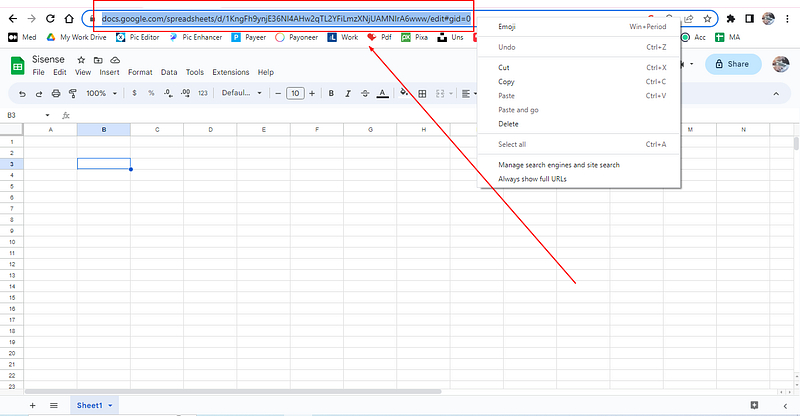
- Open the Google Sheet document that you want to use in your browser.
- Select the entire URL from the address bar of your browser and copy it using Ctrl+C or right-click and choose Copy.
- Go to Datameer and click “export” to “Google Sheets”.
- Under the File settings, paste the URL of the Google Sheet document where you want to export the data using Ctrl+V or right-click and choose Paste. Set the schedule for the export job and click on Apply.


Step 6: Connecting to Dundas BI. It’s time to set the destination.
- Go to Dundas BI and create a new data connector or edit an existing one.
- Select the Google Sheets data provider and click Next.
- Enter your Google account credentials and click Sign in. Very important! Make sure to upload the same credentials you have used to connect your google sheet to Datameer(usually in a json file).
- Allow Dundas BI to access your Google Drive data by clicking Allow.
- Enter the URL of the Google Sheet document where you exported the data and click Next.
- Select the worksheet and the range of cells that contain the data and click Next.
- Review the data structure and click Finish and voila! Your data is on its way to Dundas BI, ready to be transformed into beautiful, insightful visualizations.

And that’s it! You’ve successfully imported your data from Snowflake to Dundas BI using Datameer. You’re officially a data-importing wizard!
Tips for Efficient Data Import
You’ve mastered the basics of importing data from Snowflake to Dundas BI, but why stop there? Let’s take a look at some insider tips to make your data transfer process even smoother. Consider these your secret weapons in the data importing world!
1. Regularly Update Your Software
Keeping your software up-to-date is like keeping your car well-oiled. With the latest versions of Snowflake, Dundas BI, and Datameer, you’ll not only benefit from new features and improvements, but also avoid potential compatibility issues that might slow down your data transfer.
2. Use Filters
Data is like a garden — sometimes you need to weed out unnecessary information to let the essential data bloom. Using filters in Datameer can help you pick out the data you need and leave the rest behind, making your import process quicker and more efficient.
3. Schedule Regular Data Imports
In the data world, freshness matters. Scheduling regular imports ensures that your Dundas BI dashboards always reflect the most recent data from your Snowflake databases. It’s like having a daily delivery of fresh produce right at your doorstep!
4. Use Incremental Imports
Instead of transferring all your data every time, consider using incremental imports, which only transfer new or updated data. It’s a smart way to save time and resources while keeping your data up-to-date.
5. Validate Your Data
Remember to check your data after the import process. This can help you catch any discrepancies or issues early on, ensuring that your Dundas BI visuals are always accurate and reliable.
Why Datameer is Your Best Bet
We’ve journeyed through the process of importing data from Snowflake to Dundas BI, and it’s clear that the bridge connecting these two powerful platforms is none other than Datameer.
But why choose Datameer? Why is it the superhero of our data transfer saga?
1. Seamless Integration
Datameer works harmoniously with both Snowflake and Dundas BI, allowing for a smooth and hassle-free data import process. It’s like a universal translator, adept at understanding and translating Snowflake’s data language into something Dundas BI can easily comprehend and utilize.
2. Data Quality Assurance
With Datameer, you can rest easy knowing your data is in good hands. It doesn’t just transfer data; it checks it for quality, ensuring that your Dundas BI reports and visuals are always accurate and reliable.
3. Efficiency and Speed
Datameer is built for speed. Whether you’re dealing with a small dataset or importing terabytes of data, Datameer can handle it all quickly and efficiently. It’s like having a super-fast, never-tiring courier service for your data.
4. User-Friendly Interface
Even if you’re new to data importing, Datameer’s intuitive, user-friendly interface makes the process simple and easy to understand. It’s like having a friendly guide by your side, ensuring you never lose your way in the data import journey.
So there you have it! Using Datameer to import your data from Snowflake to Dundas BI is not just a choice — it’s the smart choice. It’s the secret ingredient that turns your data importing process from good to great.
Now that you’re equipped with the knowledge and the perfect tool, it’s time to put it into practice. Go ahead, take the leap, and let Datameer guide you in your data journey. You’ll be a data import expert before you know it!
References:
https://www.dundas.com/Support/learning/documentation/connect-to-data/how-to/connecting-to-google-sheets
https://documentation.datameer.com/datameer/